You are now ready to configure and create a managed agent for the management tool using the Self-Packager wizard.
To configure and create a managed agent:
Reminder: the Self-Packager must have an active connector on it!
- Open a browser on the host or any computer on the same network as the host.
- Browse to the Self-Packager host IP address, or from the Self-Packager host itself use http://localhost.
- Click New Package:

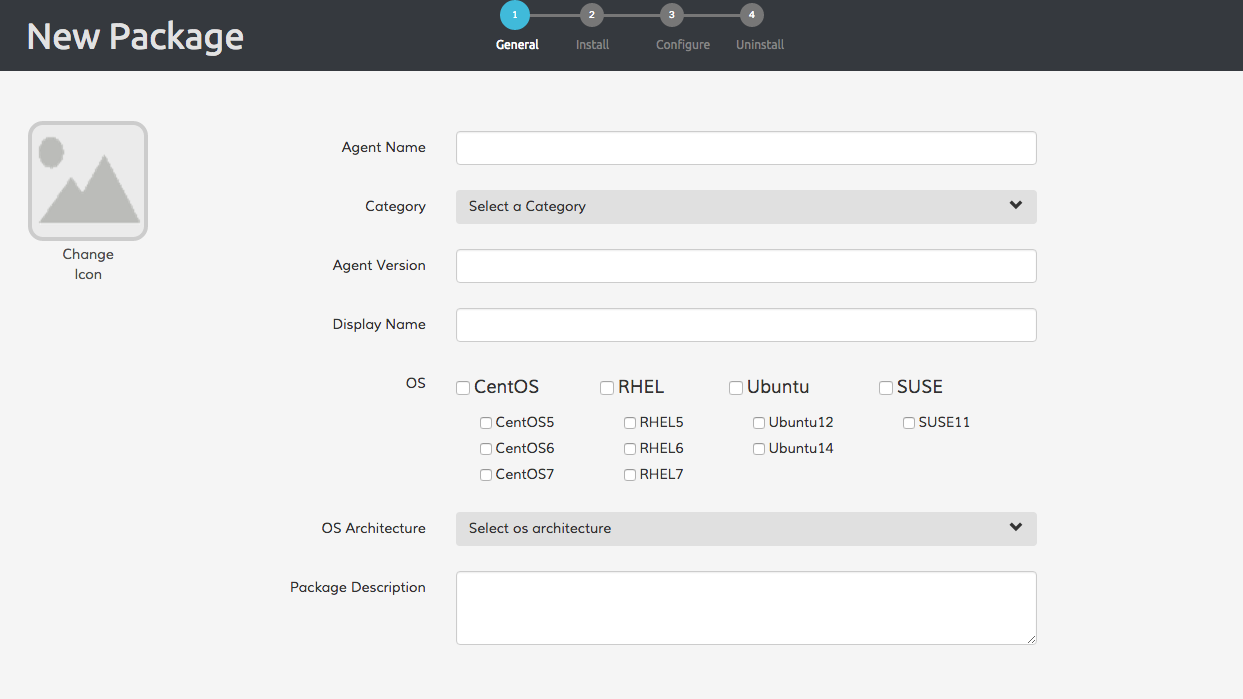
- On the General screen provide the details for the management tool:

- Agent Name: Enter the Agent Name to use (see Note 2)
- Category: Select the agent category from the drop down list (Security, Backup, etc.)
- Agent version: Enter the actual agent version (see Note 3)
- Display Name: Should include <Agent Name> + <Agent Version>
- OS version: Select the OS version (Win 2003, 2008, 2012R2, Ubuntu12, RHEL6, etc. ) (see Note 4)
- OS Architecture: x64, x32 or all-arch (the OS architecture the agent should support or will run on) (see Note 5)
- Packager Description: Optional - add free text for the current agent if needed, like comments, etc.
Note 1: All fields except for 'Package Description' are required.
Note 2: For Agent Name use only alphanumeric characters and dash (-). Spaces are not allowed.
Note 3: For Agent Version use only alphanumeric characters, dash (-) and dot (.).
Note 4: The OS version will change according to the local server. If Linux, then you will be able to choose from Linux Os versions. If Windows, then you will be able to choose from the Windows versions.
Note 6: The agent creation process will run on the same OS Architecture as that of the system where the agent will be deployed after the agent has been created. For example: when selecting “x64” the testing should only run on the x64 architecture, and it will be deployed only on x64 servers.
Click Next.
Comments
0 comments
Please sign in to leave a comment.