Pre-Req
JetPatch Application server must be able to communicate with the Microsoft Entra ID (fka Azure AD) authentication endpoint. For most customers, that will be https://login.microsoftonline.com
See this Microsoft article for more details.
Main Flow
In order to apply Microsoft Entra Single Sign-On (SSO) we need to configure Entra ID and then configure JetPatch. From Entra ID configuration we will retrieve next properties for intigua.properties file :
- azure.activedirectory.tenant-id
- spring.security.oauth2.client.registration.azure.client-id
- spring.security.oauth2.client.registration.azure.client-secret
- spring.security.oauth2.client.registration.azure.redirect-uri
- azure.activedirectory.user-group.allowed-groups
Configuring Active Directory
Configuring Entra ID is complicated, and some GUI of Entra ID could change. We will go step-by-step and provide screenshots.
(Optional) Create tenant if needed
Entra provides tenants, which are basically instances that you can use.
- Go to the the Azure portal
- Select "All resources"
-
Search "Azure Active Directory"
-
Click "create" and fill all necessary data
Switch to a tenant you want to work with
Click on user icon on the top menu
Click on “Switch directory” reference
Creation App Registration
Once you have switched to your tenant, select "Active Directory"
For the next steps you will need full admin rights.
Click on "App registrations"
Create a new registration via clicking “New Registration” button
Please note that:
- The account type must be "multitenant". The current Spring Boot starter does not work with single tenants. However users from different tenants will not be able to login - only users belonging to the tenant the ‘app registration’ was created for are allowed to login - this is also demonstrated in page # 37.
The redirect URL pattern https://{ip-or-dns-where-jetpatch-will-be-installed}/vmanage-server/oauth2/code/azure. This url we will use as value for spring.security.oauth2.client.registration.azure.redirect-uri property. If this URL do not match with URL we specify in intigua.properties, you will not be able to log in.
Click button “register”
Now we could get 2 properties that we need in JetPatch
azure.activedirectory.tenant-id
spring.security.oauth2.client.registration.azure.client-id
Select "Authentication"
In the Web "Platform configuration", check both options under "Implicit grant and hybrid flows" and click “Save” button
Click on "Certificates & secrets"
Click “New client secret” button to create a new client secret, which will be value for spring.security.oauth2.client.registration.azure.client-secret property
Provide description that you prefer and expiration date, then click “Add” button
Click “copy to clipboard” icon to get value for
spring.security.oauth2.client.registration.azure.client-secret
property.
Note! If you refresh this page you will lose possibility to get this value
Click on "API permissions"
Click “Add a permission” button
Click "Microsoft Graph" section button
Follow the instruction on the image to add "User.Read" permissions
Click on the "Grant admin consent" button
Click “Yes” in popup message
Configure Token to get group information
Click on “Token configuration” button
Click on “Add groups claim” button
Select “Security groups” checkbox, and then click on “Add” button
You will see that claims is added
Go back to your Active Directory tenant via clicking on tenant name link and click on "User settings"
Click “Manage how end users launch and view their applications” link
Validate the "Users can consent to apps accessing company data on their behalf" is set to "Yes" (this should be good by default)
Go back to your Active Directory tenant via clicking on tenant name link
Click “Groups” button
Click “New group” button
Provide group name and click the ”Create” button. Specify jetpatch as “Group name”, click “Create”
You will be redirected to list of groups, find group that you create and click on corresponding list item
You will be redirected to group overview page. On this page you will copy the id of the created group. This id will be used as a name of JetPatch Azure group
After group is created we could assign users to that group
Now we have all properties
azure.activedirectory.tenant-id
spring.security.oauth2.client.registration.azure.client-id
spring.security.oauth2.client.registration.azure.client-secret
Spring.security.oauth2.client.registration.azure.redirect-uri
And value for JetPatch Azure group
azure.group
Configuring JetPatch
Edit intigua.properties file
For versions prior to 5.0:
vim /usr/share/tomcat/default/conf/intigua.properties
post 5.0:
vim /usr/share/intigua/services/data/intigua-main/conf/intigua.properties
Add next properties
|
azure.activedirectory.tenant-id=228ae8af-967c-4755-8cc0-86677503674f spring.security.oauth2.client.registration.azure.client-id=3e0393e0-c86b-4ae3-9a00-1cfbd36e7a03 spring.security.oauth2.client.registration.azure.client-secret=nHY7Q~KBjFoc0EUKcX~yauBOk4ziQ.mWsDCJc spring.security.oauth2.client.registration.azure.redirect-uri=https://dns-name/vmanage-server/oauth2/code/{registrationId} azure.activedirectory.user-group.allowed-groups=azure_lib_requirea_not_empty_value |
Restart Tomcat For versions prior to 5.0
systemctl restart tomcat
restart intigua-main for prior 5.0
docker restart intigua-main Register JetPatch Azure group
Login as standart admin user
Click “Platform configuration” icon
Click “Users” tab
Click “Add User / Group” link
Select “Azure group” option.
Pass azure.group value into “Azure group ID” field
(Optional) Specify name for JetPatch Azure group for more readability. There is no obligation to name this group the same as the name in Azure.
Specify permissions, scopes and tools for users belonging to this group.
Click “Save” button
JrtPatch Azure group provides the possibility to manage all rights of members that belong to this group. After initial setup of groups, the customer could manage access directly from Azure AD via changing assignment of users to different groups.
Usage scenario
Login with SSO User
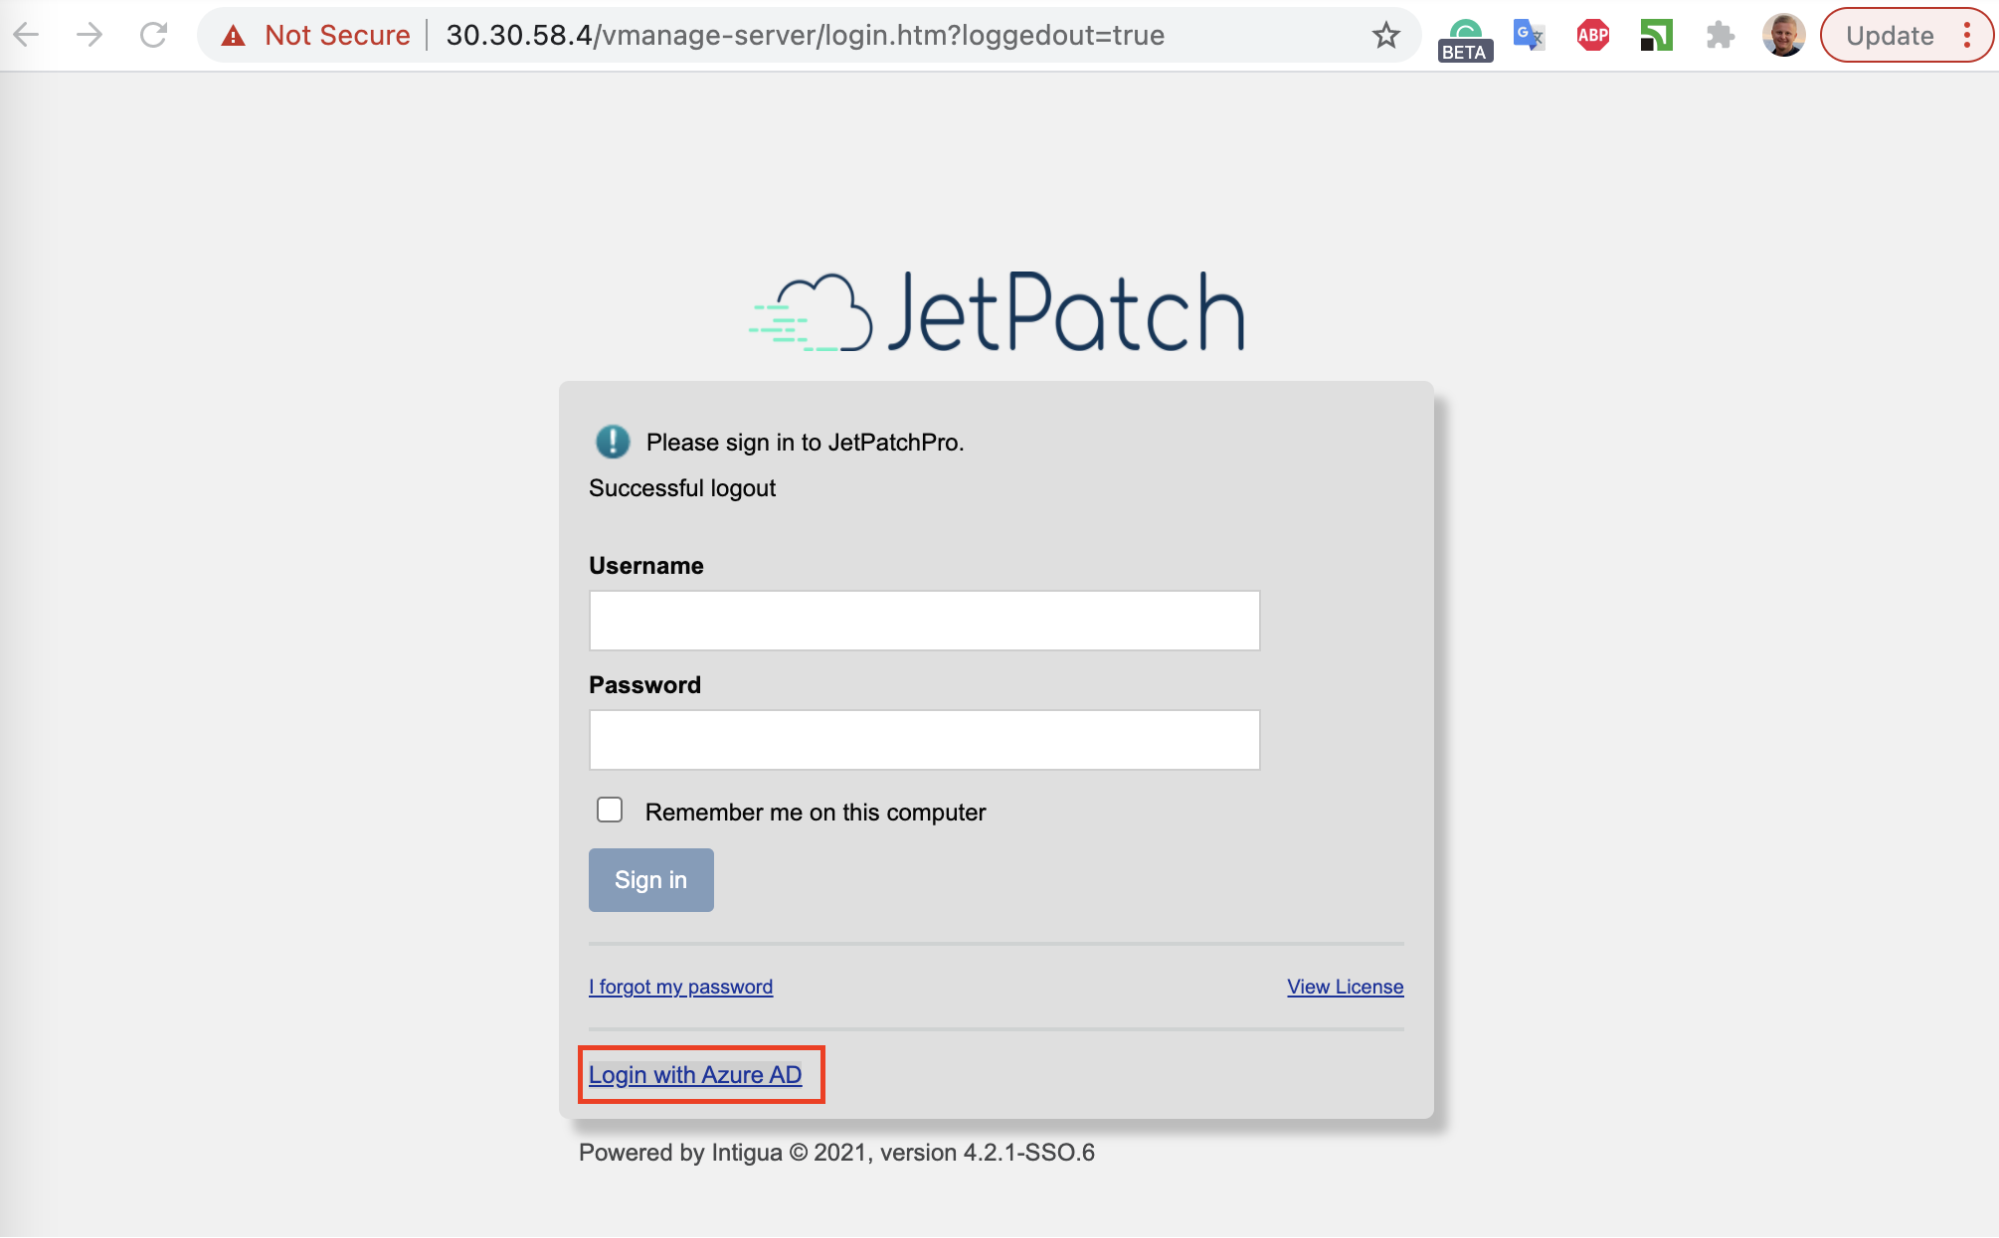
Logout and click “Login with Azure AD” link to login
 User is already Logged in Azure AD case
You will correctly redirected to default page
If we click “Platform configuration” icon
We will see that we are logged in with permissions of JetPatch Azure Group. Name of the logged user will correspond to the name of the Azure user.
User is not already Logged in Azure AD case
If you are not logged in with Azure AD and you click on “Login with Azure AD” link to login you will be prompted to login with Microsoft
Choose that account that has email that we specify when creating a local JetPatch user
User belongs to Azure AD tenant but it not assigned to any of Azure group case
If user it belongs to tenant but in our example not belong to jetpatch group he will see next message
User not belongs to Azure AD tenant case
If user is not belongs to tenant on which we create registration app
Comments
0 comments
Please sign in to leave a comment.