Video Binary Swap for Flexera (RHEL)
Video Binary Swap for Splunk (Windows)
Step-by-Step Binary Swap for ASR (Windows)
With JetPatch Self-Packager you can easily package and configure agents !
This is a step-by-step manual to package an ASR agent for Windows servers with the Self-Packager tool, based on a previously used ASR .vai file.
Pre-Requisites :
- Self Packager server running on a windows server
- ASR new installation file [this tutorial is based on ASR 9.32.0.0 exe file, released in January 2020]
- Previously used ASR .vai file (an agent image)
Step 1 : Extracting the binary files from installation file (see video)
- Double click the installation file (.exe) and copy all the extracted files to your computer.
- After the installation wizard opens, click cancel.
Step 2 : Packaging ASR via Self-Packager (see video)
- Open the Self-Packager tool via web browser
- Click on the 'New Package' button (top-right corner) and select Import Package.
- Open the ASR .vai file and wait while package is loaded
- Hover on the ASR agent and click on the edit button
- Edit the Agent Version, Check the supported windows operating systems and edit the package description. Click Next on completion.
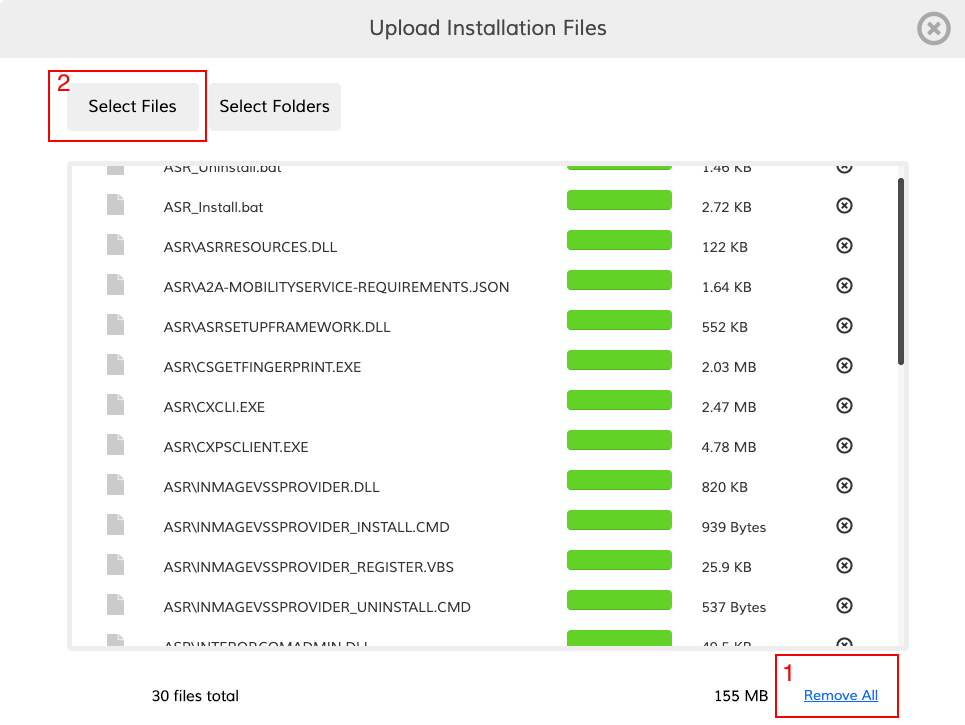
- Go to Installation section and select files. A pop up window should open with existing files. Click on 'Remove All' and then on select files

- Upload asr_install.bat and asr_unistall.bat files. You can extract them from the previous .vai file under the payload folder.
- Click on 'Choose Folders and upload the entire ASR folder you have extracted from 'step 1 -extracting binaries from installation file'. Please wait until all the files are uploaded and then close the pop-up window.
- Go to the 'Add installers' section and delete the current installer. Then click on the 'Add Installer' and add the 'ASR_INSTALL.bat' file

- Copy the following to the arguments section :${ROLE} ${REMOVE_LEGACY_WIN} "${INTIGUA_PAYLOAD}" ${PLATFORM} ${CSENDPOINT} "${INSTLOCATION}" click save.
- Click Next and navigate to the final wizard page 'uninstall'
- Remove the current uninstall files and upload the ASR_UNINSTALL.bat file (same as step 9).
- Copy the following arguemnt to the 'Arguments' section:${REMOVE_AGENT}
- Click save and exit the wizard.
- Download the new .vai file
Comments
0 comments
Please sign in to leave a comment.