Overview
This guide provides step-by-step instructions for configuring SSL encryption on Windows Server Update Services (WSUS). SSL configuration ensures secure communication between WSUS servers and client endpoints while maintaining proper certificate trust chains.
Important Notes
-
WSUS requires two ports for SSL: WSUS uses HTTPS on 8531 for update metadata and HTTP on 8530 for content downloads.
- Microsoft reduces the risk of sending update files over an unencrypted channel by signing each update. In addition, a hash is computed and sent together with the metadata for each update. When an update is downloaded, WSUS checks the digital signature and hash. If the update has been changed, it is not installed.
- You cannot configure the whole WSUS website to require SSL because all traffic to the WSUS site would have to be encrypted. WSUS encrypts update metadata only. If a computer attempts to retrieve update files on the HTTPS port, the transfer will fail.
- The certificate of the certification authority (CA) must be imported into the local computer Trusted Root CA store, or the Windows Server Update Service Trusted Root CA store on downstream WSUS servers. If the certificate is only imported to the Local User Trusted Root CA store, the downstream WSUS server will not be authenticated on the upstream server.
- You must import the certificate to all computers that will communicate with the WSUS server. This includes all client computers, downstream servers, and computers that run the WSUS Administration Console. The certificate should be imported into the local computer Trusted Root CA store or into the Windows Server Update Service Trusted Root CA store.
Step-by-Step Guide to Configure SSL on WSUS
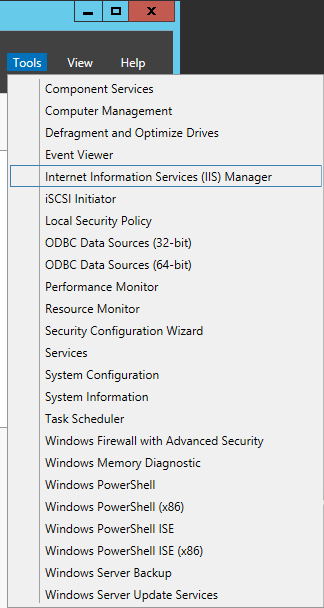
Open the IIS Management Console
- Open up Server Manager on your WSUS server

- Select Tools -> Internet Information Services (IIS) Manager
Configure Certificate Binding in IIS
- Open Sites in the connection tree > Click 'WSUS Administration.'
- Under the Actions column to your right, click on Bindings
- Select the 'https 8531' row and click edit
- Select the SSL certificate you have just created in the dropdown list. Click 'View'
- Copy to the clipboard the FQDN of the 'Issued to' server. Click OK.
- Enter the hostname you copied in the previous step into the Host name field.
- Click OK and then click on Close.
| Note: Ensure the value you use in the Host name field is a FQDN. ping from the Endpoint/s to the WSUS FQDN should be resolved to the correct IPv4 address. |
Enforce SSL Encryption on All Required WSUS Administration Virtual Roots
- SimpleAuthWebService
- DSSAuthWebService
- ServerSyncWebService
- ApiRemoting30
- ClientWebService
PowerShell Method
| Set-WebConfigurationProperty -Filter //security/access -name sslflags -Value "Ssl" -PSPath IIS:\ -Location "WSUS Administration/SimpleAuthWebService"Set-WebConfigurationProperty -Filter //security/access -name sslflags -Value "Ssl" -PSPath IIS:\ -Location "WSUS Administration/DSSAuthWebService"Set-WebConfigurationProperty -Filter //security/access -name sslflags -Value "Ssl" -PSPath IIS:\ -Location "WSUS Administration/ServerSyncWebService"Set-WebConfigurationProperty -Filter //security/access -name sslflags -Value "Ssl" -PSPath IIS:\ -Location "WSUS Administration/ApiRemoting30"Set-WebConfigurationProperty -Filter //security/access -name sslflags -Value "Ssl" -PSPath IIS:\ -Location "WSUS Administration/ClientWebService" |
IIS Manager Console Method
- Expand 'WSUS Administration' and for each of the directories above, follow the steps below:

- Select the virtual site

- Double-click on SSL Settings

- Check Require SSL and leave client certificates set to ignore.

- Click Apply at the top right corner

Finalize WSUS SSL Configuration
- Open up an elevated command prompt as Administrator

- Navigate to your WSUS installation folder
cd “c:\Program Files\Update Services\Tools” - Execute the following command (replace your server with the correct FQDN):
WSUSUtil.exe configuressl <YOUR-FQDN-of-WSUS-SERVER>”
Export the WSUS SSL certificate
-
Run MMC in Administrator mode. Click File>Add/Remote Snap-in
- Click on Certificates > Click Add.
- Click the radio button 'Computer account'. Click Next.
- Click on the Finish button
- Click OK
- Expand the Certificates (Local Computer) \ Trusted Root Certification Authorities
- Click on Certificates.
- Right-click on the certificate that matches the FQDN of this server. Click All Tasks > Export.
- DONE.
- Now, export only what clients actually need to trust, based on the certificate source:
Public CA (for example, DigiCert): no client deployment. Clients already trust the public chain.
Enterprise or Domain CA: export the issuing Root CA and any Intermediate CA from Trusted Root or Intermediate Certification Authorities, then deploy them to clients’ Trusted Root and Intermediate stores.
Self-signed TLS certificate: export the server certificate from Local Computer\Personal\Certificates that matches the WSUS FQDN, then deploy it to clients’ Trusted Root.
Next Steps
To ensure secure communication between WSUS and Windows endpoints, complete the following steps:
Trust the HTTPS certificate chain on Windows clients
Use Local Computer certificate stores.
Public CA (for example, DigiCert): No client deployment. Ensure the WSUS or JetProxy URL in GPO matches a DNS name on the certificate and that HTTPS is bound on 8531.
Enterprise or Domain CA: Deploy the issuing Root CA, and any Intermediate CA, to Local Computer\Trusted Root Certification Authorities and Local Computer\Intermediate Certification Authorities.
Self-signed TLS certificate: Deploy that same certificate to Local Computer\Trusted Root Certification Authorities on every client.
For how to deploy certificates with GPO, JetPatch script, or Connector MSI.
See Certificates (Optional) - Here
Enable Signed Updates
You must configure your system to allow signed updates from an intranet update location.
For detailed steps, please refer to the related article.
Update the Intranet Microsoft Update Service (if applicable)
If your endpoints are already configured to use WSUS on port 8530, you must update the intranet Microsoft update service URL on each endpoint to make sure they use HTTPS on port 8531.
For example, change the update service URL to: https://<your_wsus_server_FQDN>:8531
Comments
2 comments
Hi,
Thanks for that article, you should add the information that the certicat must be imported to all the clients in both the Trusted Root and Trusted Publishers
i ve lost a lot of time finding that it must be in those 2 places ;)
Also, on each clients you must use gpedit.msc and go local computer > computer configuration > administrative templates > windows components > Windows update
Then set ENABLED the option Allow Signed update from an intranet microsoft update location
Please sign in to leave a comment.